Two and a half weeks ago (time flies!), I finished a goal I had been dreading for a long time:
No. 46: Finish Painting the Secretary Desk.
Would you like to know how I did it and why it was such a hassle? Then read on!
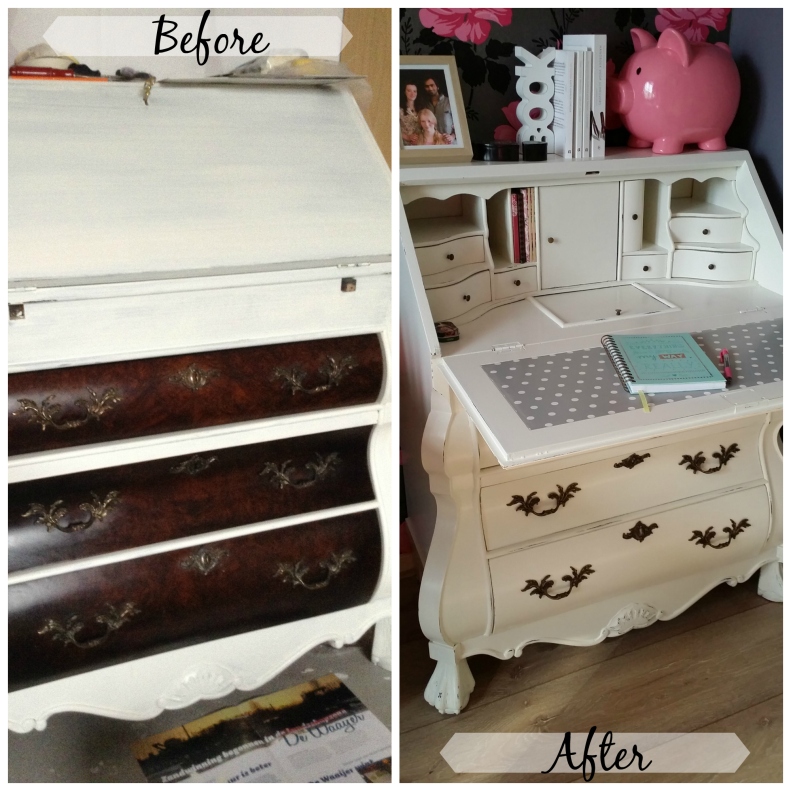
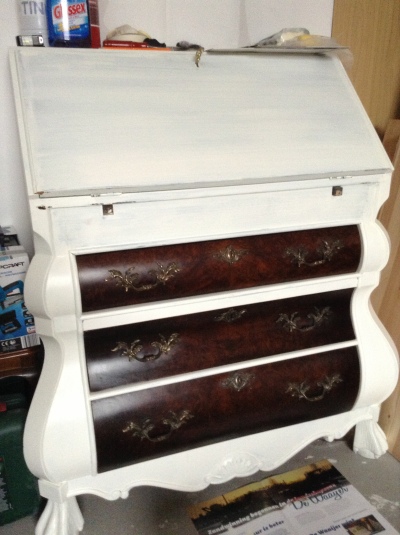
Two and a half years ago, just after I moved to my new home, I bought the most beautiful secretary desk at a thrift store. It had all these curves and and super cute tiny drawers. Also a few big ones though, with beautiful hardware. Its previous home could easily have been a castle, or a fairytale world, and now it was going to continue its existence in my little castle. There was only one problem though: It was brown. I can’t show you, because unfortunately I forgot to take a proper before photo. But it was dark brown, with a green velvet cloth on top of the desk. Ugh. Can you imagine this whole thing looking like the drawers in the picture?
Fortunately my plan was to refurbish it. It would become the desk of my dreams in no time! Except for the no time part… I had started cleaning and sanding the desk and I had even put some layers of paint on it. The frame of the desk was even finished. However, other refurbishing projects had a greater priority, so I stalled finishing the desk. I wanted to finish the furniture for our living room first, which took me some months in total. After that, I couldn’t fins the courage to restart the refurbishing of the desk. Stalling kills motivation somehow. All the pieces of the desk just stood there. Weeks became months, months became a year and a year became two years.
I lost the spirit to finish the thing. I really dreaded this project now. I never even came into the room anymore.
Until a few weeks ago. Our play Bedtime Stories needed a desk. It could have been just any regular desk, as long as it had a drawer to hide some props in. But what would be cooler than having my own desk star in my play?
When I imagined this, all my enthusiasm came back in an instant. I started sanding and painting again, I glued on the desk foil and I re-assembled the hardware. Two days before the play, it was done! I couldn’t have imagined a prettier desk on stage.
If you’d like to read on how I refurbished the desk, please read on.
Remove hardware
The first step was to remove all the hardware. It may seem like a hassle, but painting gets a lot easier and prettier this way.
I also removed the green velvet desk top, because ew. It was so old and gross and ugh. Some parts of the velvet were easy to remove, but other parts hadn’t planned on exchanging their surface for the bin just yet. I had to use a chisel to get the job done!
Clean it
The second task was to clean it thoroughly. This is the most important part of all. If you don’t clean your thrift store peace properly, you will sand the dirt into the furniture. Yikes, that’s the least you’d want right? Except for the fact that it’s gross, your paint will also not able to cover it. Instead, it will get a dirty smokey yellowish color (assuming your paint color is white). So, clean the thing!
What I did was clean it in three steps:
- I cleaned it with regular detergent with lemon. The lemon part is important, because lemon helps take off any grease.
- After that, I cleaned it another time with a mixture of ammonia and water. This probably was the least appealing task of the whole project, because of the terrible smell. But it really helps taking all the filth of the desk!
- I always clean my project another time with detergent, to make it smell nicer. If the furniture still smells bad after this step, you will have to repeat step 2 again. I once had a cupboard I had to clean 6 times with ammonia at least! Luckily, this secretary desk was a lot cleaner already. The third step was sufficient.
Sand
For the paint to adhere properly on its surface, sanding is absolutely required. It’s okay, I’ve got a sanding machine. That didn’t work for all the curved little drawers though, so I had to sand them by hand. This first sanding job I did with number 80, a medium grit. I sanded it long enough not to see any shining spot anymore. And then of course, I cleaned it again.
Paint
Ah, finally, the best part! Painting is so fulfilling, because you see the transformation happening before your eyes. My first layer of paint was a white primer. This is really important to apply before the real paint, because it helps the paint adhere to the surface. But even more importantly, the real paint will actually have the promised color. Without priming first, the paint may get darker or more yellow.
After the primer I sanded the desk with a 120 grit sandpaper. Just a bit, I didn’t want to sand off all the primer of course!
Finally it was time for the real paint! I love a shabby chic look, but my bank account refuses to provide me the money for the expensive chalk paint, unfortunately. I’ve found a good substitute, though.
I bought Histor, which is a good quality, medium priced paint you can buy in any Dutch hardware store. I found out that as long as it’s acrylic and has a mat finish, it will look shabby chic just the same. Really, it doesn’t have to be Annie Sloan to be pretty. The color I chose was lily white.
I often read blogs about refurbishing furniture where people use spray paint. Whenever I see that, my heart skips a beat. Spray paint makes it so… even. I don’t want that. I want an old look, I want to see that it’s real wood underneath. So I used a brush. Yes. A brush. I know, it’s a lot of work, but this truly gives the best results. I made sure I applied the strokes in the same direction as the veins in the wood. That way, it would look the most natural.
Inside the drawers I wasn’t so fuzzy about the looks, so I used a paint roller for those parts.
Sand
Yeah, one layer of paint won’t do the trick, so I had to sand again! Obviously, I didn’t want all of my hard work to be undone after the sanding, so I used sanding grit 120 again. Another round of cleaning (did I mention I hate cleaning?) and I was ready to pick up my paint brushes again.
Paint, sand, paint endlessly
I applied my second layer of paint. This still wasn’t enough though. I sanded it again, but this time with a very fine grit, 180. After the third layer of paint, I applied a fourth layer of paint on some parts without sanding in between. If I really had to, because paint had dripped on the surface, I used grit 180. By the way, this is the part where I abandoned my project for months, er… years. After the umpteenth layer of paint, I really didn’t want to sand and clean the whole thing again. Even the painting part started to annoy me. Such a shame, I was so close near the end. I’m so glad I found the courage again to restart the project a few weeks ago!
Apply desk foil
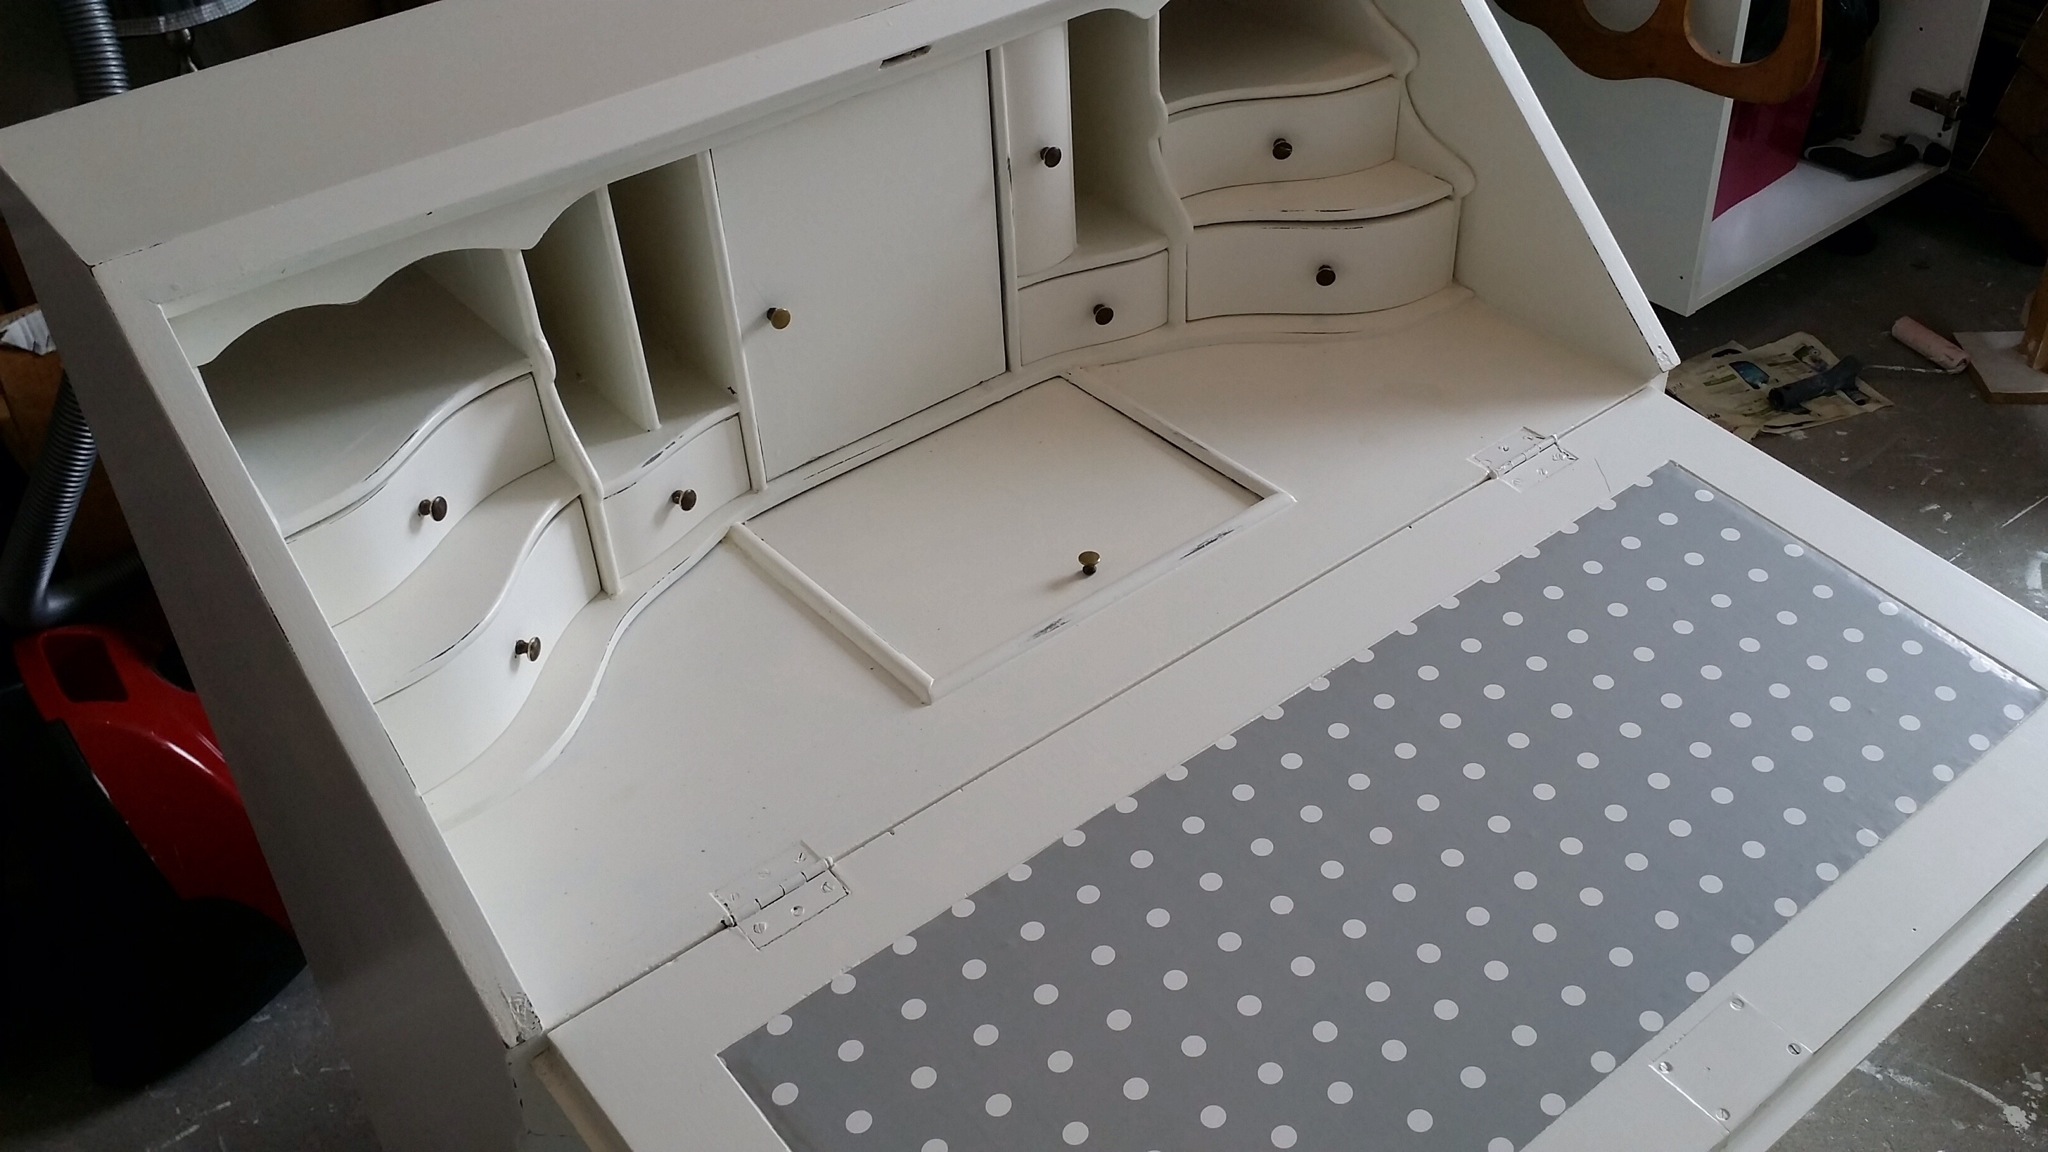
Remember I had removed the green velvet desk top? That thing actually had been there for a reason. If the wood is your underground, your handwriting will look all shaky and ugly. So I bought some foil to put on the desk. It had taken me some time to find the right one. I didn’t want it to be boring, but it shouldn’t have a wild pattern either, and the color should be neutral. I found a nice grey one with dots. I think it looks pretty!
Reassemble hardware
The end was nigh! I only had to reassemble the hardware! Piece of cake, right? Er, no. I hadn’t taken into account that the screws for the drawer knobs had been in the drawers the entire time. I painted them white. Layer after layer. So now I had to scrape all the paint off of them. Before I could screw the knobs back on. Ugh.
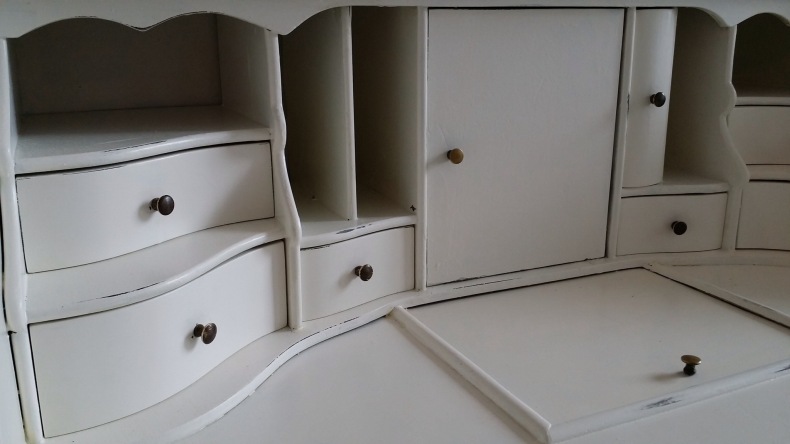
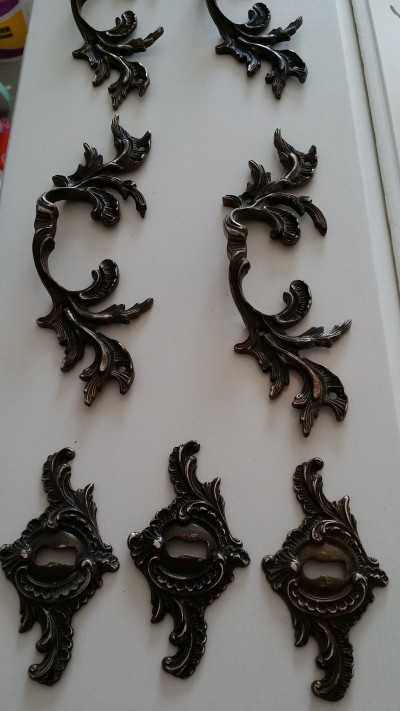
The hardware for the big drawers I sanded before attaching them. I could have spray painted them in a nice metallic color of course, but I kinda like the old antique look. Spray painting them would make them too new in my opinion. But I wanted to make them less dull as they were. That’s why I chose to sand them. By doing that, I got part of the old color and gloss back. See?
Sand
Wut? Sand again? Yes, definitely, but this kind of sanding actually is my favorite part to refurbishing a piece of furniture! I wanted a shabby chic desk, but with all the fresh layers of paint, this one looked new! Time to sand it down a little. I used a fine grit sandpaper (120) for this. No machine this time, because I wanted to keep the surfaces as they were. I only sanded the edges.
If you ever want to do this, don’t be afraid to sand to much. As long as you only sand the edges and corners of your furniture you’re fine. Try to imagine where it would damage if you would own it for a few decades.
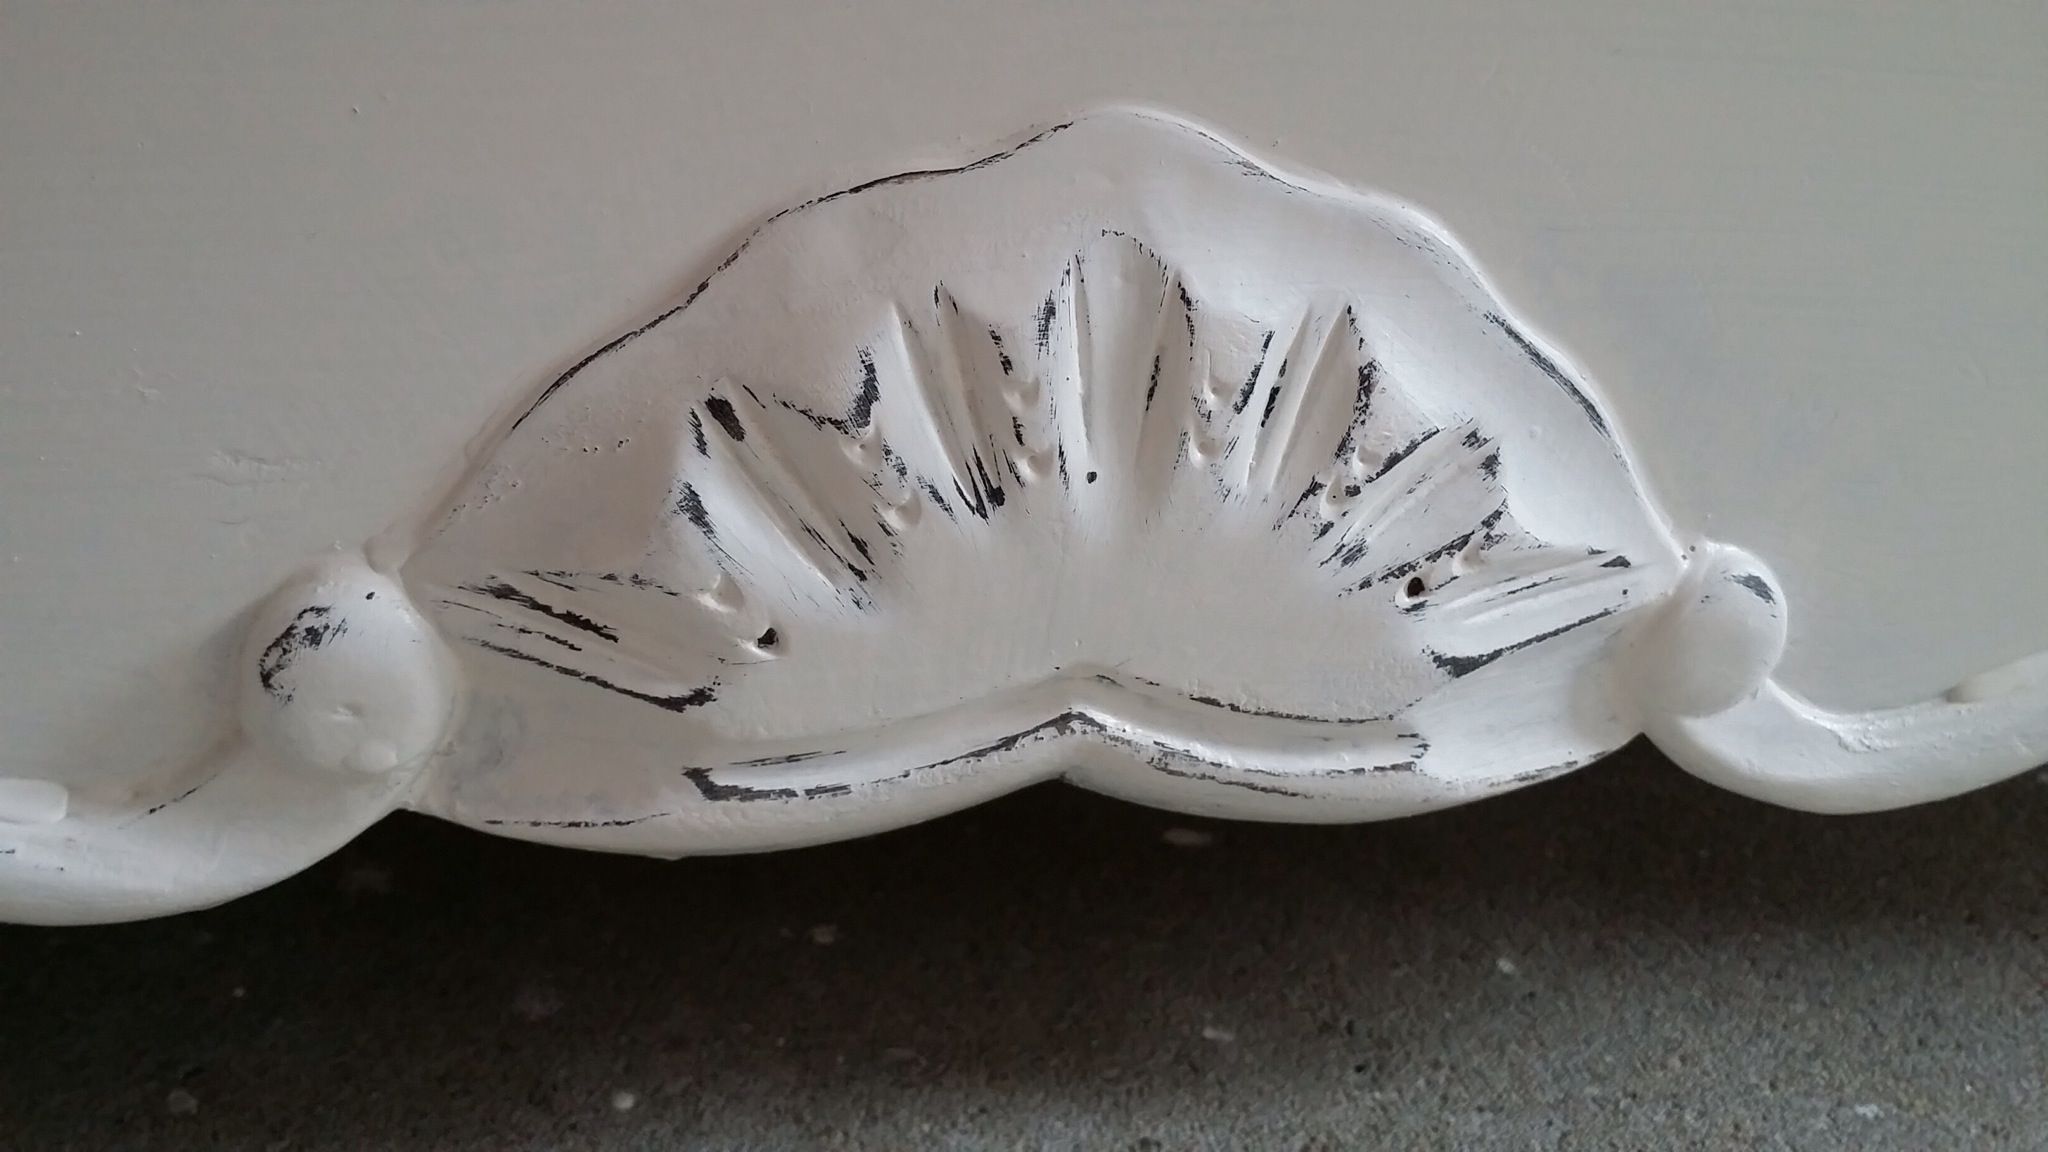
My desk also had some ornaments at the bottom. I wanted them to stand out a bit more. That’s why I chose to sand them as well. The opposite applies here though. Sand the insides of the ornament, that way the contrast lets the relief stand out. Like this:
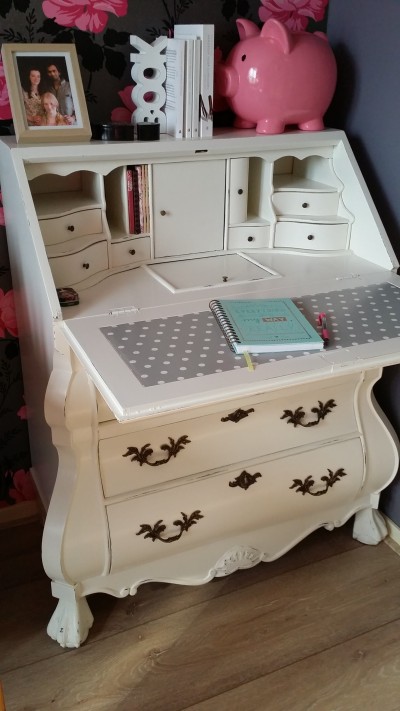
After this final bit of sanding, the desk was finally done! And just in time to shine on stage in our play Bedtime Stories. It looked super awesome on stage, don’t you think?
After the play I put it in its righteous place. Although it probably won’t stand here forever, since I would love to have this secretary desk in our library room. But for that, well, we’d first need a library room. Right now that room is being used as our refurbishing room, so it will take at least some months (positive thinking ftw!) for that room to be finished. Up until then, it has a special spot in our study. Don’t you think it looks like a real fairy tale desk?
Notice the picture on the desk? That was the family photo that was standing on the desk during the play. It’s such a special picture to me. I think it belongs to the desk now, so I decided it stays there. It gives me happy memories every time I look at it.
This is not just a desk. It’s a desk that reminds me of struggle and effort, but also of perseverance. But most of all, this is a desk which is connected to my most happy memories. This is why I know I will keep this desk in my life forever. I love it.


I love this! It’s beautiful and exactly the kind of thing my husband would never want in our house – we have a happy compromise somewhere between my love of vintage and his love of sleek and modern and things this old just don’t make the cut… it’s beautiful. You did an amazing job.
LikeLike
Oh too bad your husband won’t approve of such a desk! My boyfriend didn’t really get the whole shabby chic thing either when he just moved in, but it started to grow on him fortunately.
LikeLiked by 1 person
The desk is beautiful. You did a great job. It is always amazing what painting antique furniture does. We are consolidating my parents house of antiques and collectibles. Nobody seems to want antique furniture unless it has a more contemporary feel or shabby chic look.
LikeLike
Omg for some reason I just now got the notification of your reply! Thank you so much. I absolutely love antique furniture, it doesn’t even have to be antique. As long as it has a story. I love furniture I can refurbish myself, so I can add my own signature to it. 🙂
LikeLike
Absolutely beautiful! I love the vintage look.
LikeLike
Thank you!
LikeLiked by 1 person
Oh my gosh… I love secretaries and yours is so beautiful!! Also, the background on your blog is awesome. I love it!
LikeLike
Thank you! I also was totally in love with it first time I laid my eyes on it. A guy almost bought it right before me and I really panicked. I was so glad he walked away! I claimed the desk immediately. ^_^
You really love the background? Wow, I actually am thinking of changing it into something a bit more calm and professional. Also it would have the same color scheme as my company website then. I wondered if anybody but me even liked it! 😀
LikeLike
Pingback: A Year Into the Day Zero Project ~ 26 Goals Accomplished | Tanya's 101